Family Snorkeling Tours: GoPro Settings to Lock Before You Get Wet

Updated: 4 days ago
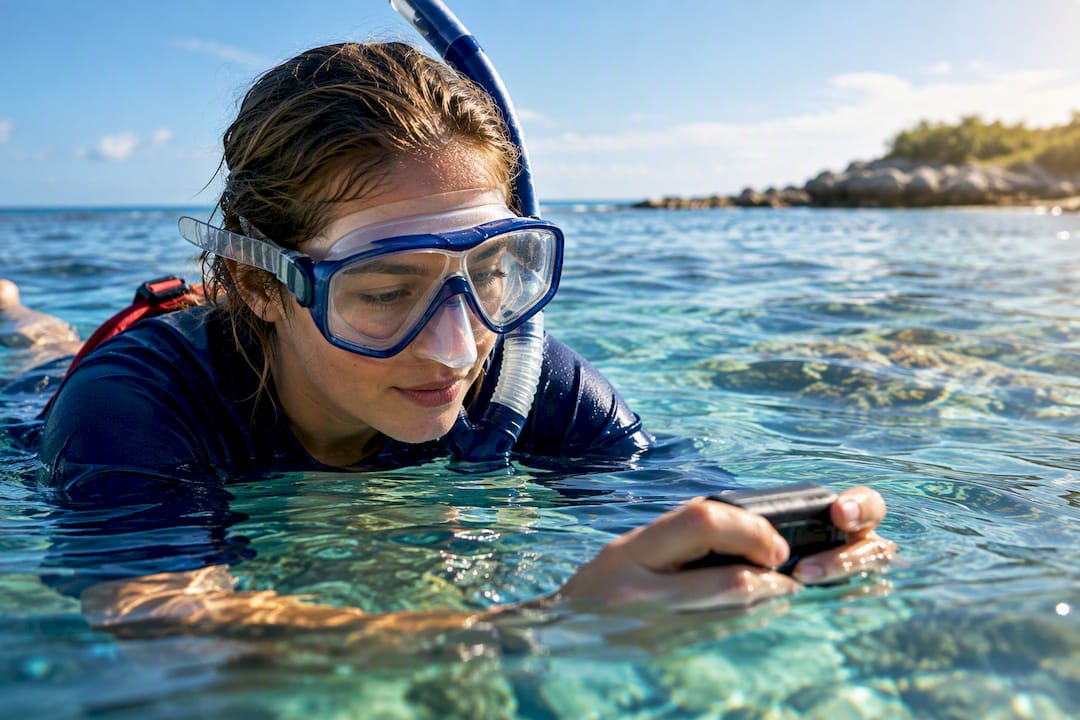
Lock a single video preset on the boat, clip on a floaty or wrist leash, and film in short bursts with the sun at your back. That’s the whole playbook. Do those three things before you enter the water, and you’ll come home with usable footage instead of a lost camera or a folder of blurry blue clips.
TL;DR:
Lock a single video preset with 4K or 2.7K at 30-60 fps before entering the water, as the touchscreen becomes unresponsive underwater.
Use a floaty or wrist leash, and perform a tug test on the mount to prevent losing the camera during snorkeling.
Keep clips at 10-20 seconds, angle the lens downward, and stabilize the camera for steady, quality footage with minimal fuss.
Filming in shallow, sunny water yields the best natural colors without extra filters, while clouds and surface glare affect footage quality.
Private tours provide more prep time, hands-on assistance, and calm, sheltered spots, making it easier to manage equipment and get good shots.
Table of Contents
Best GoPro Snorkeling Settings To Set On The Boat
Get this done at the dock or on the ride out, because the touchscreen won’t register once you’re in the water. Everything below takes less than five minutes and saves you from fumbling with wet fingers later.
Pick one video mode and save it as your preset. Standard 4K or 2.7K at 30 to 60 frames per second handles most snorkel conditions fine. Set it once, and don’t touch it again until you’re back on deck.
Learn the top-button shortcut. GoPro’s own guidance points out that the top shutter button starts and stops recording on whatever preset is loaded, which matters because that’s the only control that reliably works underwater.
Pack a charged spare battery and a card with room to spare. Store the camera in a padded pocket or dry bag between snorkel stops, not loose in a beach bag.
Attach the floaty or wrist leash and do a click-and-tug test. Clip it, tug hard, confirm it holds before you go anywhere near the ladder.
Shoot one test clip half above and half below the surface. Check the framing and watch for fogging on the lens.
Rinse and inspect the housing seal after the trip, before you pack it away for the next outing.
Pro Tip: Do your test clip in the shade of the boat first. Fogging and water droplets show up faster in bright sun, and it’s easier to fix a foggy lens dockside than mid swim.
Which Mounts Work Best For Family Snorkel Tours?
For a private, captain-led tour with kids or non-swimmers aboard, the floaty handle is the default answer. It keeps the camera buoyant if it slips from your hand, and operator writeups from multiple snorkel tours consistently point to it as the safest general-purpose choice.
Floaty handle or wrist strap: first choice for nearly every guest, because it floats and it’s easy to hand off to a kid for a few seconds.
Short selfie stick (12 to 24 inches): useful for getting a wider group shot or filming a child snorkeling next to you, but it’s one more thing to manage in the water.
Mask or head mount: works if you want a hands-free point-of-view angle, though it means whatever you look at is what gets filmed, glare and all.
Chest mount: usually a poor fit for snorkeling. It sits below the surface at an awkward angle and tends to catch on gear.
Pro Tip: Whatever mount you pick, run the same click-and-tug test you did with the floaty. A mount that feels secure on the dock can loosen once your wetsuit or rash guard gets wet.
How Do You Film Steady, Usable Clips In The Water?
Good footage from a snorkel tour comes down to short clips, calm hands, and paying attention to the guide, not fancy settings.
Keep clips to 10 or 20 seconds. Start and stop with the top button between moments worth capturing, which also stretches your battery across a longer session.
Angle the lens slightly downward. This captures reef and fish detail without catching as much surface glare.
Move from your torso, not your wrist. A short selfie stick with your elbow tucked in produces steadier footage than swinging the camera around. Turn on stabilization (HyperSmooth, on cameras that support it) for extra help.
Follow the captain’s lead on distance and direction. Wildlife encounters go better, and last longer, when guests stay where the guide points.
If you must change a setting, tread water and lift your hands above the surface first. The screen simply won’t respond while submerged, so trying to adjust it underwater just wastes air and attention.
None of this requires advanced camera knowledge. It’s closer to a habit you build in the first five minutes, then repeat for the rest of the trip.
Why Does Underwater Footage Look So Blue?
Water absorbs color starting almost immediately, and red disappears first, which is why footage shot even a few feet down often looks flat and blue-green compared to what your eyes saw in person.
Shallow, sunny water gives you the truest color, so surface-level snorkeling in bright conditions is where a GoPro performs best without any extra gear.
Red filters can help at real depth, but for the calm, shallow spots typical of a guided snorkel tour, they’re usually unnecessary weight in your bag.
Keep the sun behind you or off to the side rather than facing into it, and grab a few seconds of footage right at the surface, where color still reads naturally.
Shoot video rather than stills when you’re unsure of lighting. You can always pull a still frame from a video clip later, but you can’t add motion to a photo.
One detail worth knowing: shallow reef color starts shifting within just a few feet of depth, according to tour-tested framing and lighting guidance from snorkel operators who deal with this daily. Staying near the surface isn’t just a safety habit, it’s also your best color-correction tool.
Keeping Your Camera And The Reef Safe
A GoPro is replaceable. A memory card full of a family’s only footage from a trip isn’t, and neither is the reef you’re floating over.
Always attach a wrist leash or floaty, and test the buckle before you get in the water, not after.
Keep one hand free at all times, whether that’s for signaling the boat, helping a child, or steadying yourself on the ladder. Secure the camera to your wrist or mount before you climb back aboard.
Rinse the camera and housing with fresh water once you’re back on the boat or at the dock. Saltwater left to dry on seals and buttons causes long-term damage, a point echoed in general GoPro snorkeling care guidance.
Use reef-safe sunscreen and let marine life set the distance. Don’t chase, touch, or corner anything for a better shot.
Pro Tip: If you’re filming with kids nearby, decide who’s “camera hands” before you enter the water. Trying to film and supervise a child at the same time is how leashes get skipped.
How Private, Guided Tours Make This Easier
Pcbprestige runs private snorkeling and dolphin tours on a 26-foot powerboat with a licensed local captain, which changes the camera equation more than most guests expect. On a crowded group tour, you’re setting your preset while the boat’s already moving. On a private charter, the captain picks calm, sheltered spots and gives guests time to run through the checklist above before anyone’s in the water.
That means less improvising and more hands-on help if a strap needs adjusting or a setting needs checking before you jump in. For more on gearing up before the trip, Pcbprestige’s guide on what to wear snorkeling and its breakdown of snorkeling breathing techniques cover the parts of trip prep that happen before the camera ever comes out.
How Do You Stretch A GoPro Battery Through A Full Snorkel Trip?
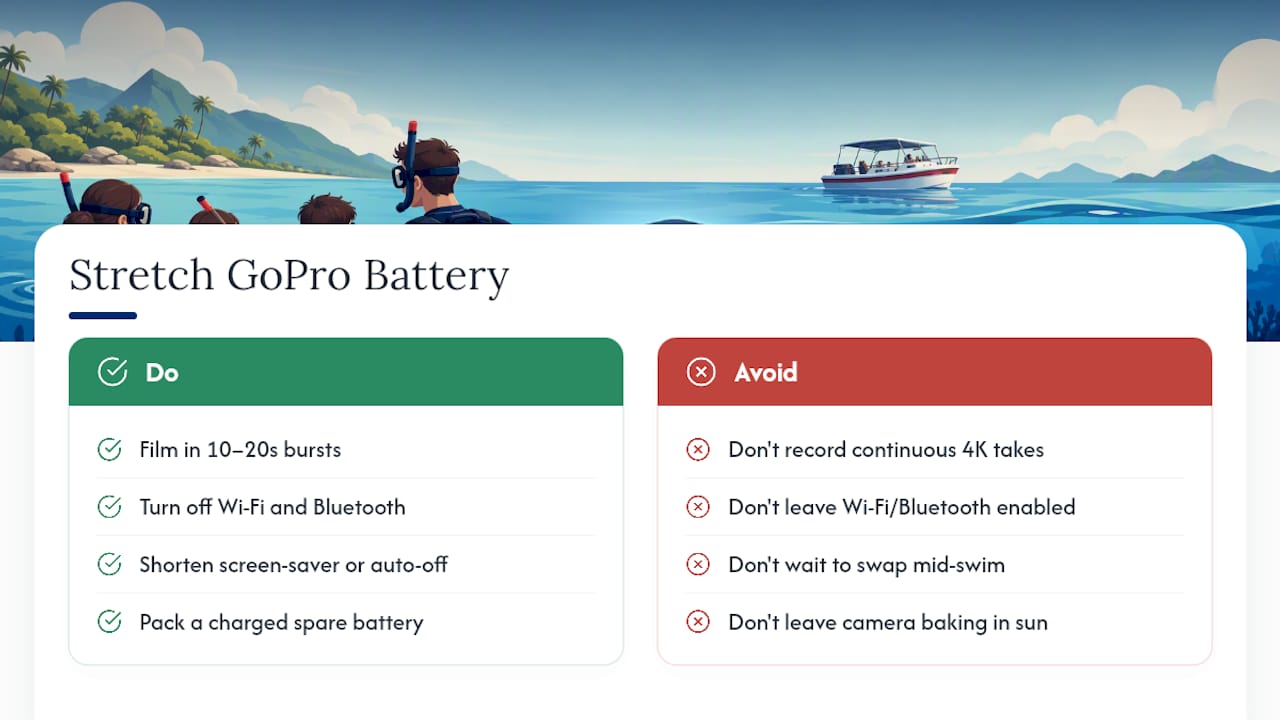
A GoPro battery drains fast in continuous 4K recording, especially in warm water where the housing traps heat. The single biggest lever you have is clip length: filming in 10 to 20 second bursts instead of one long continuous take can stretch a single charge across an entire multi-hour outing.
Turn off Wi-Fi and Bluetooth before you get in the water. Neither does anything useful mid-swim, and both quietly drain the battery in the background. If your camera has a screen-saver or auto-off setting, shorten it so the display isn’t lit up between shots.
Pack at least one charged spare battery in a dry bag, and swap it during a break rather than waiting for a dead camera mid-swim. On a private, multi-stop tour, the pause between snorkel spots is the natural moment to check your charge and swap if needed, something worth building into your pre-trip packing list before you ever leave the dock.
Cold water actually helps battery life compared to hot, humid air, so a camera that’s been baking in a beach bag will drain faster once it hits the water than one that’s been kept in shade.
Should You Use Burst Mode Or Time-Lapse Underwater?
Burst mode works well for one specific snorkel moment: a fish or ray passing quickly through frame where you want one sharp still out of a fast sequence. Fire it as the animal enters your view, and sort through the frames later rather than trying to time a single perfect shot.
Time-lapse is a better fit for slower scenes, like drifting over a reef bed or capturing the whole group snorkeling together from a fixed position. It compresses several minutes of gentle movement into a short, watchable clip, which suits the pace of most private snorkel tours better than a long static video would.
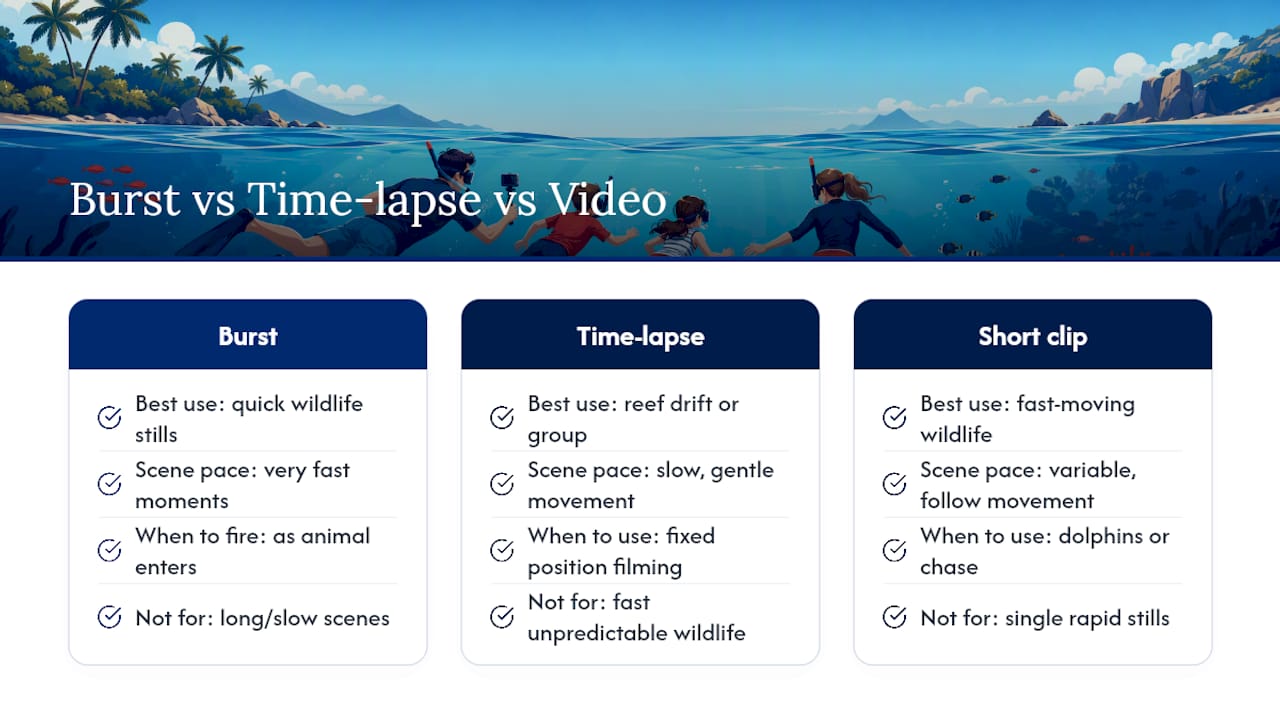
Neither mode is a good match for fast-moving wildlife like dolphins. Standard short-clip video, following the framing and movement guidance covered earlier, captures a dolphin encounter far better than a time-lapse ever will, since dolphins move too quickly and unpredictably for a slowed-down capture mode to keep up. Save burst and time-lapse for the calmer, more predictable moments of the trip, and switch back to your locked video preset any time wildlife shows up.
What Beginners Get Wrong About GoPro Settings
Most advice aimed at snorkelers online is really written for divers, and it shows. Protune menus, manual white balance, ISO locks: none of that matters much for a family floating over a reef in eight feet of clear water for an hour. The gap between what most GoPro content promises and what a snorkel guest actually needs is bigger than most articles admit.
What the evidence here actually supports is almost boring in its simplicity. The guests who come home with good footage aren’t the ones who fiddled with settings mid swim. They’re the ones who locked a preset on the boat, clipped on a floaty, and filmed in short bursts near the surface where the light and color still look natural. That’s it.
If there’s one place conventional advice falls short, it’s underselling the touchscreen problem. Guests find out the hard way, mid swim, that nothing responds, and that’s usually the moment a good clip turns into a missed one. Sort that out on deck, and the rest of the trip takes care of itself. Prioritize the boring checklist over the fancy setting every time.
— Justin
Book A Private Tour With Camera-Friendly Guidance
If juggling a GoPro on a crowded group tour sounds like more stress than it’s worth, a private charter solves that problem directly. Pcbprestige’s tours cap each trip at six guests, so there’s actual room and time for the captain to help with mount checks, floaty tests, and settings before anyone gets in the water, instead of rushing a boat full of strangers through a single briefing.

PCB Prestige offers one private 3-hour tour for up to six guests at $450 plus tax per group. Choose dolphin watching, Shell Island beach time and shell hunting, snorkeling when conditions and water clarity allow, or a combination with Captain Justin. The final departure of the day is the sunset option; confirm seasonal timing before booking.
Sources
For camera specifics, see GoPro’s own floaty accessory page and its snorkeling and diving how-to guide. For trip prep, Pcbprestige’s guides on cleaning snorkel gear and how to snorkel on a private Shell Island tour fill in the rest. Travel photographers looking for broader framing and lighting ideas can also check this photography spot guide.
FAQ
What Are The Best GoPro Settings For Snorkeling?
A single 4K or 2.7K video preset at 30 to 60 frames per second, set before you enter the water, covers most snorkel conditions. Turn on stabilization if your camera supports it, and avoid switching modes mid swim since the touchscreen won’t respond underwater anyway.
Do I Need A Floaty Or Leash For My GoPro?
Yes. A GoPro Floaty or wrist leash keeps the camera buoyant and recoverable if it slips from your hand, which is the single most common way guests lose a camera on a snorkel trip.
GoPro Vs IPhone For Snorkeling: Which Is Better?
A GoPro is built for water from the start, with a rugged housing and mounts designed for swimming and diving, while an iPhone needs a separate waterproof case and is harder to mount securely. For a private snorkel tour where you want hands-free, stable footage, a GoPro with a floaty handle is the simpler choice.
Why Won’t My GoPro Touchscreen Work Underwater?
Touchscreens don’t register touch reliably once submerged, so any setting change needs to happen either before you enter the water or with your hands lifted above the surface. That’s why locking a preset on the boat matters so much for snorkel tours.
How Much Does A Private Snorkeling Tour With Pcbprestige Cost?
The private 3-hour tour costs $450 plus tax per group of up to six guests. The sunset departure is the final trip of the day within the same tour offering. Check availability on the booking page.
Recommended
Comments