Clean Snorkel Gear the Right Way After Every Trip
- PCB Prestige

- 4 days ago
- 11 min read
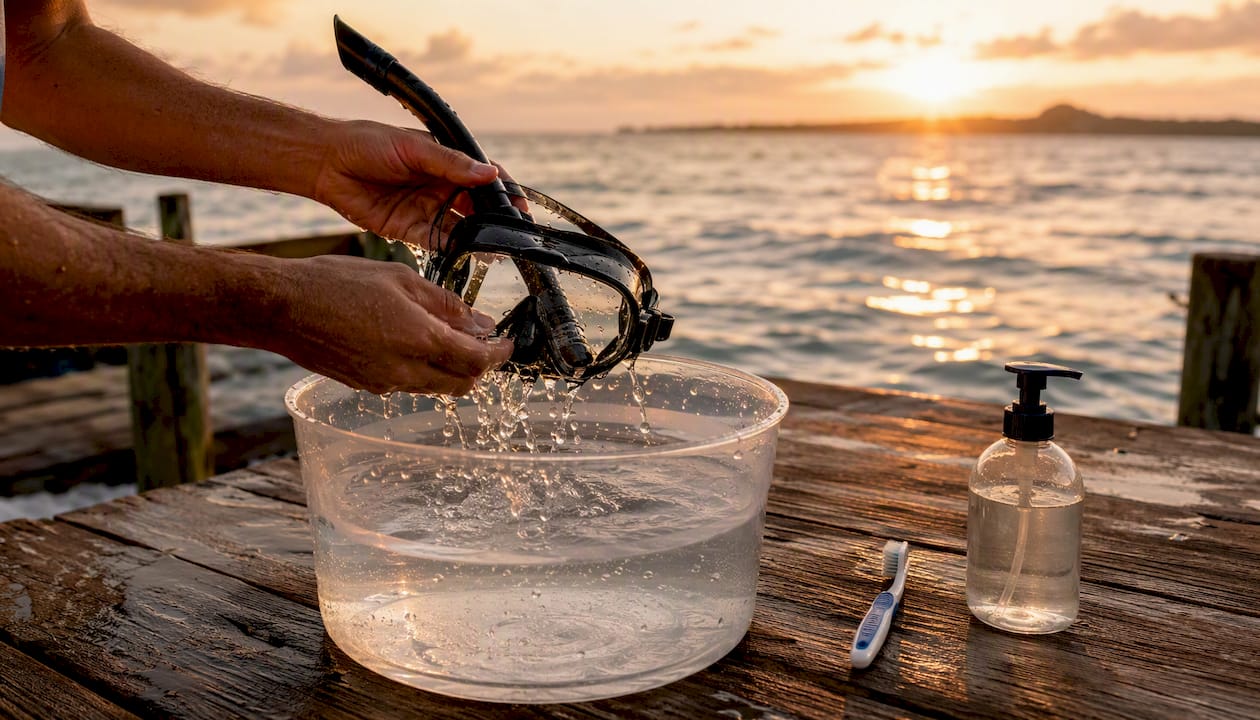
Rinse it, wash it, flush the tube, rinse again, then dry it in the shade. That five-step routine is really the whole answer to keeping personal snorkel gear hygienic and functional for years. Disinfecting with vinegar or diluted bleach only enters the picture if you’re sharing gear, renting equipment, or fighting off mold and odor that a plain wash cannot remove.
Here’s the checklist to run through the moment you’re back on the boat or the sand:
Rinse mask, snorkel, and fins in fresh water immediately, before salt and sand dry into the seams.
Wash with a few drops of unscented mild dish soap on a soft cloth, working into the mask skirt and mouthpiece.
Flush the snorkel tube and purge valve with water to clear any residual saliva or debris.
Rinse everything one more time to remove soap film.
Lay gear out to air-dry fully in shade before bagging or storing it.
Skip the disinfecting step for gear that’s yours alone and used regularly. Add it in only when gear gets passed between people, sits unused and damp for weeks, or starts smelling musty no matter how many times you rinse it. DAN World’s equipment guidance treats mouthpiece sanitation the same way it treats regulator mouthpieces, which tells you how seriously that one part deserves attention.
Key Takeaways
Clean snorkel gear comes down to rinsing immediately, washing with mild soap, flushing internal passages, rinsing again, and drying fully in shade before every storage.
Point | Details |
Follow the core routine | Rinse, wash with mild soap, flush the snorkel and valve, rinse again, then air-dry in shade. |
Know when to disinfect | Disinfect shared, rental, or persistently moldy gear; skip it for regularly cleaned personal gear. |
Watch for replacement signs | Embedded mold, brittle silicone, scratched lenses, or a leaking valve mean replace, not clean. |
Dry and store properly | Air-dry completely before bagging, and use breathable mesh bags with silica gel packets. |
Try Pcbprestige for a gear-free option | Pcbprestige’s private Shell Island tours include sanitized, maintained snorkel gear for every guest. |
Table of Contents
How to Clean Snorkel Gear (And Why It’s Worth the Five Minutes)
Skipping the rinse doesn’t just leave things smelling swampy. It shortens the life of your gear and creates a genuine, if uncommon, health risk.
Silicone mask skirts and rubber mouthpieces are warm, wet, and dark for hours at a time, exactly the conditions bacteria and mold favor. Add trapped salt and sunscreen residue, and you get a slow chemical assault on the material itself. Salt crystals work into seams and grind against O-rings and valve flaps every time you flex the gear. Sunscreen oils build a film that attracts grit and speeds up UV degradation once the gear sits in a bag.
Serious infections traced back to dive or snorkel gear are rare, but the bigger risk is mechanical: salt and sand lodged in seams and valves cause equipment failure at exactly the wrong moment, in the water.
That’s the core of what Divers Alert Network has flagged in its own diver hygiene guidance, and it applies just as directly to a family snorkeling trip as it does to a certified dive.
A basic freshwater rinse plus a full air-dry addresses most of that risk on its own. Skip both regularly and you’re looking at:
More skin and eye irritation from residue buildup on the mask skirt
Persistent, hard-to-shift odors in the mouthpiece and snorkel tube
Silicone that stiffens and cracks years earlier than it should
Purge valves that stick or fail to seal because of dried salt
None of that requires an elaborate cleaning setup. It requires doing the basic steps every single time, not just when the gear starts to smell.
What You Actually Need to Clean and Sanitize Snorkel Gear
You don’t need a specialty kit. A short shopping list covers nearly every situation, and knowing what to leave off that list matters just as much.
Item | Purpose | Notes |
Fresh water | First and last rinse after every use | Safe for all gear; use lukewarm, never hot |
Unscented mild dish soap | Cuts through sunscreen, oil, and salt film | Safe for silicone and rubber in small amounts |
Soft cloth | Wiping down the mask lens and skirt | Never substitute paper towels |
Soft-bristle toothbrush | Reaching into purge valves and strap buckles | Use gentle pressure only |
White vinegar | Dissolving mineral deposits and light mold | Dilute; never use full strength on silicone |
Diluted bleach or hydrogen peroxide | Disinfecting shared or rental gear only | Rinse thoroughly afterward, always |
Microfiber towel | Patting gear dry before shade drying | Reduces water spotting on lenses |
Breathable mesh bag | Storage that lets residual moisture escape | Prevents the mildew that sealed bags trap in |
Silica gel packets | Absorbing ambient humidity in storage | Especially useful in humid coastal climates |
Skip anything not on that list unless you know exactly what it does to silicone. Dishwashers run too hot and can warp mouthpieces and cloud lens coatings, according to the same step-by-step disinfectant guidance that outlines safe dilution ratios below. Strong solvents, petroleum-based cleaners, whitening toothpaste, concentrated acids, and full-strength bleach all attack rubber and silicone at the molecular level, leaving them brittle months before they should be. Save the lens for a soft cloth only. Paper towels and gritty cleaners leave micro-scratches that ruin an anti-fog coating permanently.
How Do You Clean a Snorkel Mask, Tube, and Fins Step by Step?
The full routine only takes a few extra minutes past a basic rinse, and it’s the same five moves every time, just applied differently across each piece of gear.
Rinse everything under running fresh water for at least 30 seconds per item, working salt out of every crease and joint.
Wash with a soapy, damp cloth, using a drop or two of mild dish soap diluted in water, not a thick lather.
Scrub targeted spots with a soft-bristle toothbrush, focusing on the mouthpiece, purge valve, buckle hinges, and mask skirt edges.
Flush internal passages, running water directly through the snorkel tube and around the purge valve to dislodge anything trapped inside.
Rinse a final time, making sure no soap film remains, since dried soap residue can irritate skin on the next use.
Air-dry completely in shade before bagging anything, which is the step most people skip and most gear damage traces back to.
Each piece needs its own attention within that sequence. On the mask, work soap into the skirt where it meets your face, wipe the lens with the soft cloth only, clear the nose pocket of any trapped sand, and check the strap buckle for grit that could crack it under tension. On the snorkel, focus scrubbing on the top opening and the purge valve at the bottom, since both trap organic residue, and treat the mouthpiece the way DAN recommends treating a regulator mouthpiece: soap, rinse, dry, repeat. On fins, flip foot pockets inside out if the design allows it, rinse grit from the strap and heel buckle, and flex the hinge gently underwater to work salt out before it dries in place.
Pro Tip: Prop your mask lens-down and slightly tilted after rinsing so water drains straight out of the nose pocket instead of sitting there. That single habit prevents most of the mildew smell people fight later.
While you’re cleaning, run your fingers along every seam. Small tears in the skirt, a stiff spot in the purge valve, or a hairline crack in the tube are far easier to catch now than mid-trip. Readers curious about fin fit and hinge wear can check our guide to open heel versus full foot fins for what normal wear looks like versus what signals a real problem.
How Do You Get Rid of Mold, Yellowing, and Snorkel Odors?
Surface mold looks like a thin dusty film, usually gray or pale green, sitting on top of the silicone rather than inside it. That kind responds well to a short soak: mix white vinegar with water at roughly a 1:3 ratio and let the affected part sit for 10 to 20 minutes, then scrub gently with the soft-bristle toothbrush before rinsing thoroughly, a method outlined in detail by Snorkel Pursuits. If the discoloration doesn’t lift and instead looks baked into the material itself, that’s embedded mold, and no soak fixes that, only replacement does.
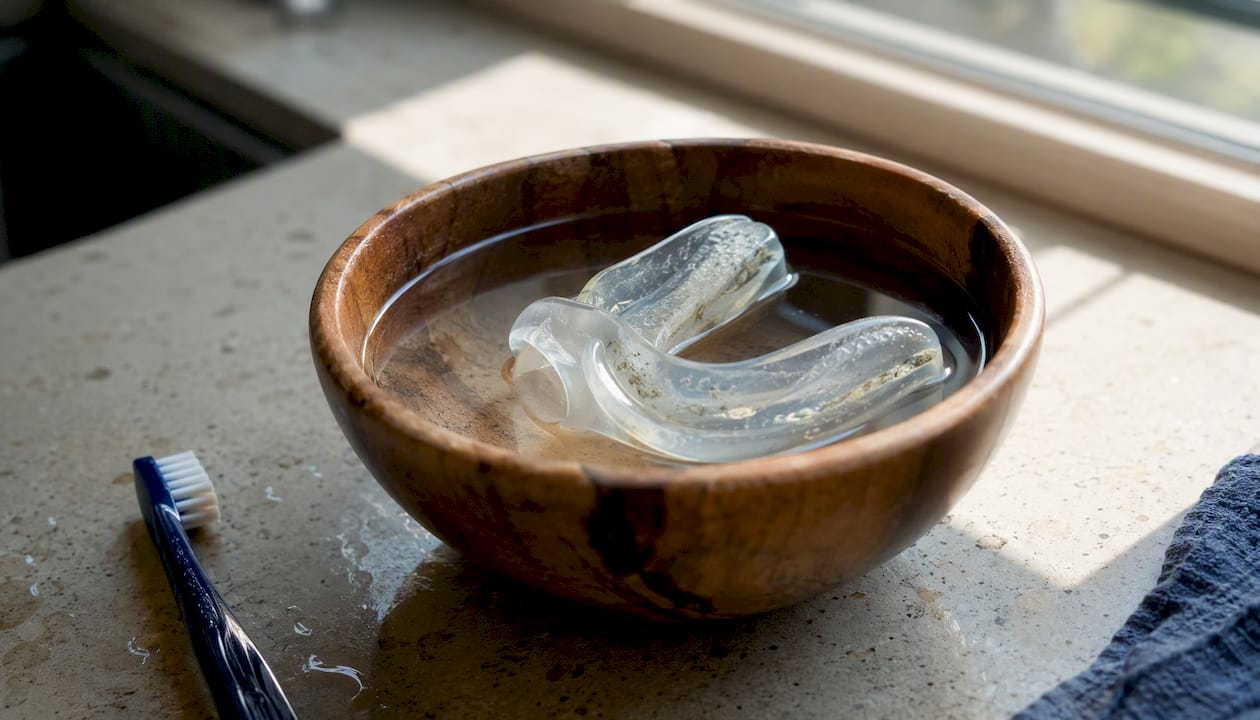
Yellowing has two separate causes, and they call for different responses. UV yellowing comes from sun exposure breaking down the silicone’s polymer structure, and it’s permanent. No amount of soaking reverses it, though it usually doesn’t affect performance until the material also starts feeling stiff. Residue yellowing, on the other hand, comes from built-up sunscreen oil and mineral deposits, and a vinegar soak followed by a thorough soap wash typically clears it right up.
Persistent odor is almost always trapped organic matter, not the material itself. Work through this before assuming the gear is a lost cause:
Soak the smelly section in a baking soda and water paste for 15 to 20 minutes, then rinse well.
Follow with a short vinegar soak if the smell is still noticeable, since operators like Kona Snorkel & Sail rely on this combination for stubborn cases.
Rinse under running water for a full minute afterward, since leftover baking soda or vinegar residue can irritate skin.
Air-dry in shade for several hours longer than usual, since lingering moisture is what let the odor take hold in the first place.
Smell-test the gear once fully dry. If the odor returns within a day of storage, the smell is embedded rather than surface-level, and that’s a replacement signal, not a cleaning one.
When Should You Disinfect Shared or Rental Snorkel Gear?
Private, personally owned gear rarely needs true disinfection. A consistent rinse-wash-dry routine keeps bacterial load low enough that stronger chemicals are overkill. Disinfection becomes necessary when gear passes between multiple users, when it’s a rental returning from unknown hands, when you can see visible grime or discoloration you didn’t put there, or when mold and odor keep coming back despite regular washing.
The dilution and contact time matter more than the disinfectant you pick. Too weak and it does nothing. Too strong or too long, and you’re degrading the same silicone you’re trying to protect.
Disinfectant | Dilution | Contact time | Material notes |
White vinegar | 1 part vinegar to 3 parts water | 15 minutes | Gentle option, safe for regular rotation on silicone |
Household bleach | 1 teaspoon per gallon of water | 10 minutes | Effective against biofilm; rinse extensively afterward |
Hydrogen peroxide | Standard 3% solution, undiluted | 10 minutes | Milder than bleach; good middle-ground option |
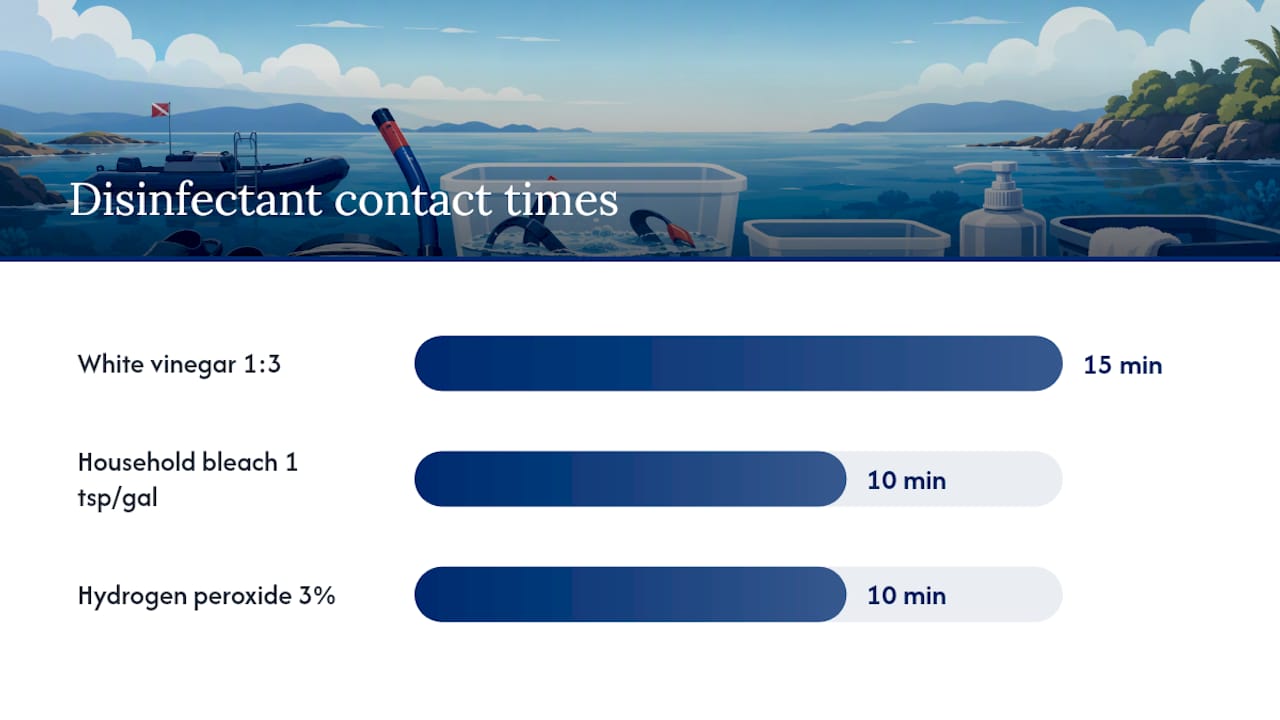
This dilution table draws from the six-step disinfectant method, which also outlines the sequence to follow: pre-wash with soap first, then move to the disinfectant soak, then rinse thoroughly, then dry completely. Skipping the pre-wash lets organic matter shield bacteria from the disinfectant, so the order isn’t optional.
A few safety notes worth keeping in mind. Work in a ventilated space when using bleach, since fumes concentrate fast in a small bathroom. Never mix bleach and vinegar together. Combining an acid and a chlorine-based disinfectant releases chlorine gas, which is dangerous even in small amounts. Vinegar is the gentler everyday choice for routine deodorizing, while bleach handles tougher biofilms but demands a careful rinse afterward, since comprehensive sanitizing guidance notes that leftover bleach residue is a common cause of post-cleaning skin irritation.
Common Mistakes That Damage Snorkel Gear
A handful of habits quietly wreck gear that would otherwise last for years, and most people don’t realize they’re doing it until the damage shows up.
Running gear through the dishwasher. Heat above 104°F warps mouthpieces and clouds anti-fog lens coatings; hand-wash in lukewarm water instead.
Soaking gear in full-strength bleach. Undiluted bleach breaks down silicone’s flexibility fast; always dilute, per the ratios above.
Scrubbing hard with stiff brushes or abrasive pads. This scratches the mask lens and thins rubber seals; a soft-bristle toothbrush is plenty.
Wiping the lens with paper towels. The fibers leave micro-scratches that permanently dull an anti-fog coating; use a soft cloth only.
Storing damp gear in sealed plastic bags. Trapped moisture regrows mold within roughly 48 hours; breathable mesh bags let residual humidity escape.
Using scented or antibacterial soaps. Fragrance additives can irritate the skin around your eyes and mouth on the next wear; stick to unscented dish soap.
When Should You Replace Snorkel Gear Instead of Cleaning It?
Cleaning fixes surface problems. It doesn’t fix material failure, and knowing the difference saves you from wasting time scrubbing something that needs to go in the trash instead.
Embedded mold that discolors the material itself rather than sitting on the surface, especially inside a purge valve or nose pocket where hidden growth is common, signals it’s time to swap the part, not keep soaking it.
Silicone that’s gone stiff, brittle, or visibly torn has lost its seal integrity and won’t cushion your face properly no matter how clean it is.
Lens scratches that distort your vision underwater are permanent and a hazard worth addressing before your next trip.
A purge valve that won’t seal, letting water leak in with every breath, is a mechanical failure that cleaning cannot repair.
Odor that returns within a day of thorough cleaning and full drying usually means the smell has worked into the material at a level a soak can’t reach.
If you’re weighing what to replace first, start with the mouthpiece and skirt, since both sit against skin constantly and wear out faster than the tube or fin blades. Rental and shared gear deserves a stricter standard than your own personal set. When in doubt on something you didn’t buy yourself, ask the operator when it was last replaced rather than assuming a quick rinse solved everything.
A Quick Take on Building the Habit
Cleaning gear thoroughly once means little if it’s a one-time event instead of a habit. The people who actually keep their gear in good shape for years aren’t the ones who found some perfect cleaning product, they’re the ones who rinse everything within minutes of climbing out of the water, every single time, without exception.
Pro Tip: Keep a small dedicated rinse bucket in your car or boat bag. Having water on hand the second you’re done removes the only real excuse for skipping the rinse step.
Book a Private Tour with Gear Already Handled
Cleaning your own mask and fins is worth doing well, but sometimes the better move is skipping the gear entirely. Pcbprestige runs private snorkeling and dolphin tours around Panama City Beach where sanitized, well-maintained equipment is already part of the trip, so nobody in your group has to think about vinegar soaks or drying racks before or after.

Every charter aboard the 26-foot boat includes masks, snorkels, and fins kept in proper condition between trips, captained by a licensed local guide who knows Shell Island’s calmest, richest spots for spotting marine life up close, just like a Great Barrier Reef Snorkelling Tour - Half Day that cares for gear and guests meticulously. It’s still worth running the rinse-wash-dry routine on your own gear at home. But for a family outing or a small group trip where you’d rather focus on the dolphins than the disinfectant ratios, a private Shell Island snorkeling tour covers that side of things for you. Check open dates and book a private tour to see what’s available for your group.
Frequently Asked Questions
How often should I deep clean my snorkel gear? A quick rinse belongs after every single use. A full mild-soap wash with scrubbing should happen every two to three outings, or immediately if you notice odor, film, or discoloration.
Can I use regular dish soap to clean snorkel gear? Yes, as long as it’s unscented and mild. Scented or antibacterial formulas can leave residue that irritates skin around the eyes and mouth.
Is vinegar or bleach better for sanitizing snorkel gear? Vinegar works well for routine deodorizing and light mold, and it’s gentler on silicone. Bleach handles tougher biofilm buildup but needs precise dilution and a thorough rinse afterward.
Why does my snorkel mouthpiece still smell after washing? Lingering odor after a proper wash usually means bacteria have worked into the material itself. Try a baking soda soak followed by a vinegar rinse; if the smell returns within a day, the mouthpiece likely needs replacing.
Can I put snorkel gear in the dishwasher? No. Dishwasher heat can exceed 104°F, which warps mouthpieces and damages anti-fog lens coatings. Hand-wash in lukewarm water instead.
Sources
Recommended
Comments